Buy $MAPO Using HiveSwap on Map Protocol
![]() Do you have assets on Binance Smart Chain or Ethereum Protocol and want to buy $MAPO on the Map Protocol?
Do you have assets on Binance Smart Chain or Ethereum Protocol and want to buy $MAPO on the Map Protocol?
![]() This guide walks you through the process of bridging $USDC from the Binance Smart Chain to the Map Protocol, so that you can use hiveswap.io to swap $USDC for $MAPO on the Map Protocol. The same guide can be followed using the Ethereum Protocol and other tokens such as $ETH.
This guide walks you through the process of bridging $USDC from the Binance Smart Chain to the Map Protocol, so that you can use hiveswap.io to swap $USDC for $MAPO on the Map Protocol. The same guide can be followed using the Ethereum Protocol and other tokens such as $ETH.
![]() Our journey will begin with bridging the wrapped $USDC from the Binance Smart Chain (BSC) to the Map Protocol, enabling its seamless integration into the Map Protocol ecosystem.
Our journey will begin with bridging the wrapped $USDC from the Binance Smart Chain (BSC) to the Map Protocol, enabling its seamless integration into the Map Protocol ecosystem.
![]() Finally, we will utilize hiveswap.io to exchange $USDC for $MAPO on the Map Protocol.
Finally, we will utilize hiveswap.io to exchange $USDC for $MAPO on the Map Protocol.

 Crypo Wallet Required
![]() In this guide we will be using
In this guide we will be using ![]() Metamask.io wallet to connect to chains. Head over to
Metamask.io wallet to connect to chains. Head over to ![]() Metamask.io if you need a wallet.
Metamask.io if you need a wallet.
![]() If you have not already done so, add the Map Protocol and Binance Smart Chain (BSC) to your wallet using the details below.
If you have not already done so, add the Map Protocol and Binance Smart Chain (BSC) to your wallet using the details below.
| Field | Value to enter |
|---|---|
| Network name | MAP Mainnet |
| New RPC URL | https://rpc.maplabs.io |
| Chain ID | 22776 |
| Currency symbol | MAP |
| Block explorer URL | https://maposcan.io |
| Field | Value to enter |
|---|---|
| Network Name | Bsc Smart Chain |
| New RPC URL | https://bsc-dataseed.binance.org/ |
| ChainID | 56 |
| Symbol | BNB |
| Block Explorer URL | https://bscscan.com |
 Bridging the $USDC to Map Protocol
 Navigate to the bridge — https://bridge.mapprotocol.io
This provides the user interface for bridging $MAPO from the Binance Smart Chain (BSC) (and others) to Map Protocol. This will bring up the interface where you can enter the required information for the bridge.
You should be already connected to Binance Smart Chain (BSC) as indicated in the top right corner of the website.

Green light, ready to go.
 If not, click the ‘Connect’ button in the same location.

Let me in!
step by step
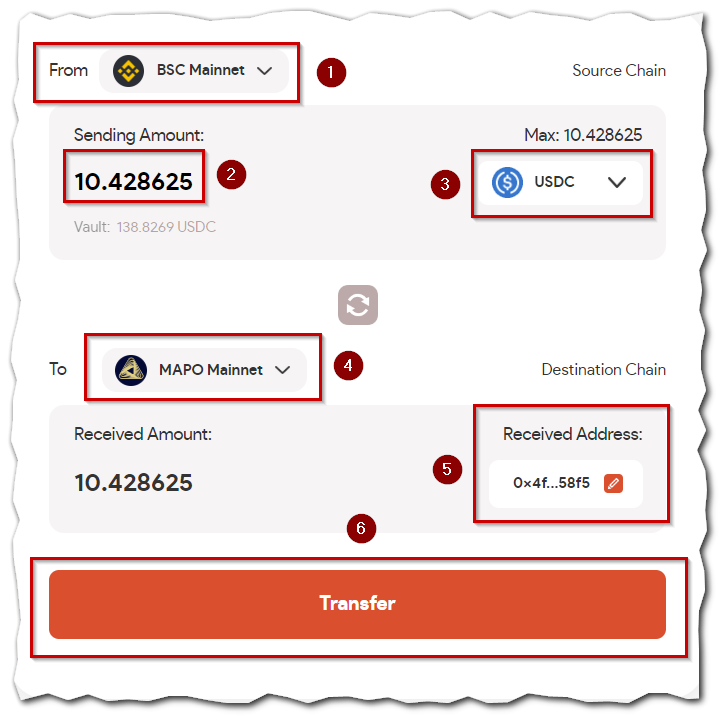
- Ensure ‘From’ is BSC Mainnet.

- The amount of $UDSC to send.
- Token to send — $UDSC.
- Network to send to — MAPO Mainnet.
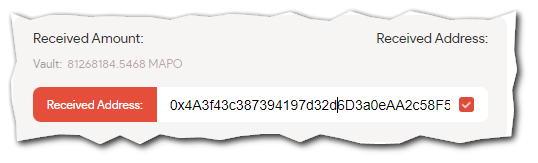
- Enter the address where you wish to receive the token or leave as the default: sending address.
Send a gift of MAPO to friends
Before proceeding with the transfer, review the transaction details to ensure that everything is correct. If everything looks good, initiate the transfer by clicking the “Transfer” button (6). ![]()
You will be asked to confirm the transaction in your wallet.
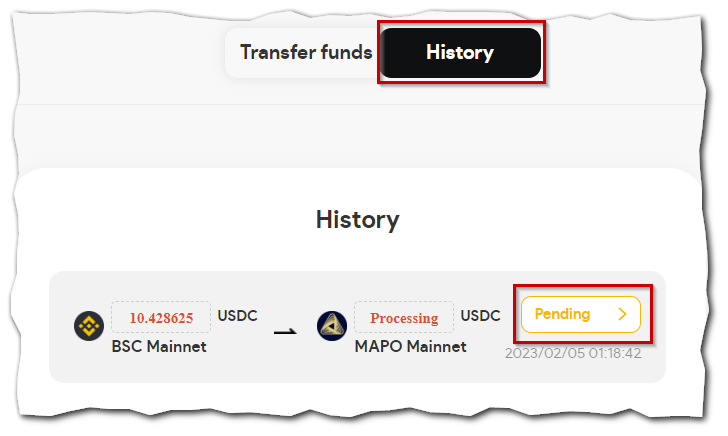
The transfer will take some time to complete as it requires several confirmations on the Binance Smart Chain (BSC) and the Map Protocol. During this time, you can monitor the status of the bridge by going to the ‘History’ tab and tracking the status of the transaction.
Pending…
 Click on the ‘Pending’ button to open up the ‘Transaction Detail’.
Here you can view the amounts sending and receiving, any $MAPO fees and the status of each transaction in their corresponding chains.
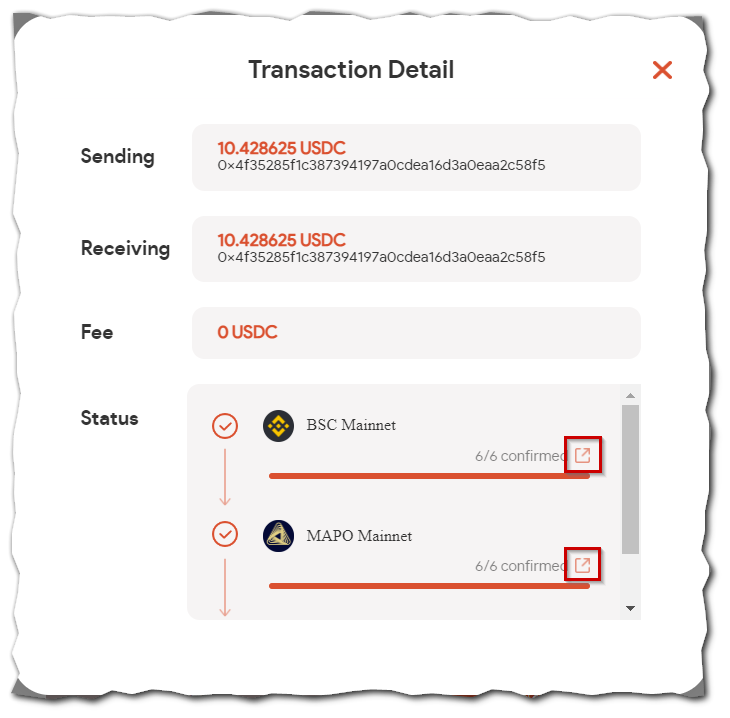
You can see further detail by clicking the links to the explorer of both Map Protocol and the other protocol.
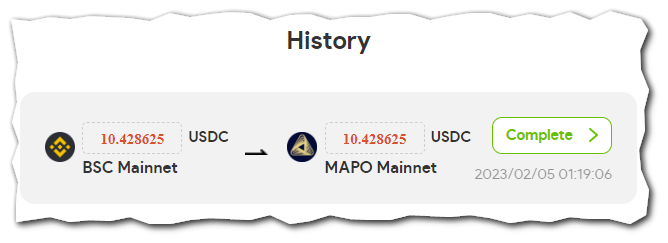
Transaction confirmed!
Once all transactions are confirmed, we can now switch chains to Map Protocol and you will now be able to access and utilize your $MAPO within the Map Protocol ecosystem.
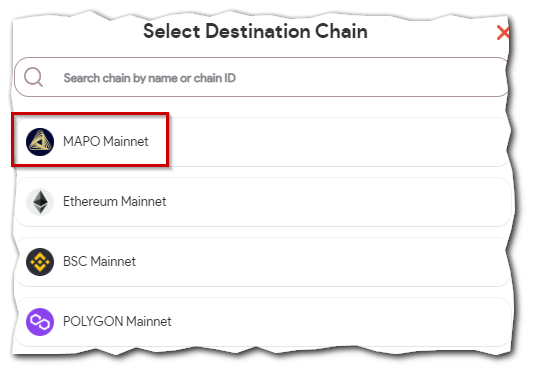
 We can check by switching the ‘From’ chain to $MAPO.
You will be prompted to change to the Map Protocol .
Let’s take a look on the other side…
Checking out the MAPO!
![]() We can see the $USDC tokens on the Map Protocol.
We can see the $USDC tokens on the Map Protocol.
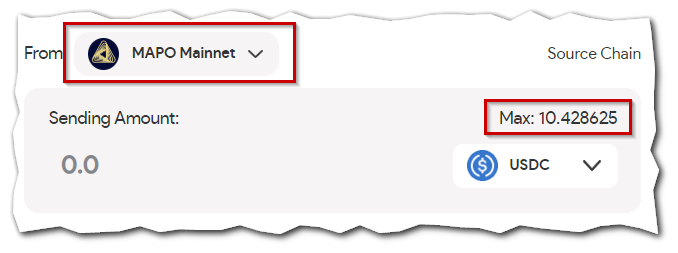
 Now you have $USDC tokens on the Map Protocol
 Swap $USDC for $MAPO on HiveSwap

We are now ready to embark on the journey of swapping our $USDC for $MAPO using hiveswap.io.
![]() Navigate to hiveswap.io and ensure you are connected to the Map Protocol
Navigate to hiveswap.io and ensure you are connected to the Map Protocol

Connected…
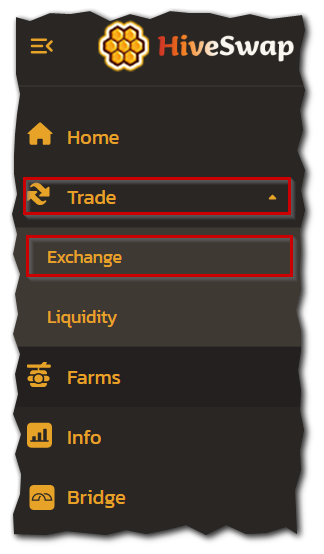
![]() Select the “Trade” option. From there, choose “Exchange” from the menu.
Select the “Trade” option. From there, choose “Exchange” from the menu.
![]() In the “From” field, select $USDC and in the “To” field, select $MAPO.
In the “From” field, select $USDC and in the “To” field, select $MAPO.
Before Swapping you need to ‘Enable USDC’ this will approve your address with the contract.

Approve me please!
This allows you to grant the smart contract the necessary permissions to interact with your tokens. This is an important step because, without approval, the smart contract would not be able to access your tokens and execute trades. Once you approve the interaction, the smart contract can then carry out trades on your behalf.
![]() Enter the amount of $USDC you wish to swap and click ‘Swap’
Enter the amount of $USDC you wish to swap and click ‘Swap’

![]() Review the amounts and ‘Confirm Swap’
Review the amounts and ‘Confirm Swap’
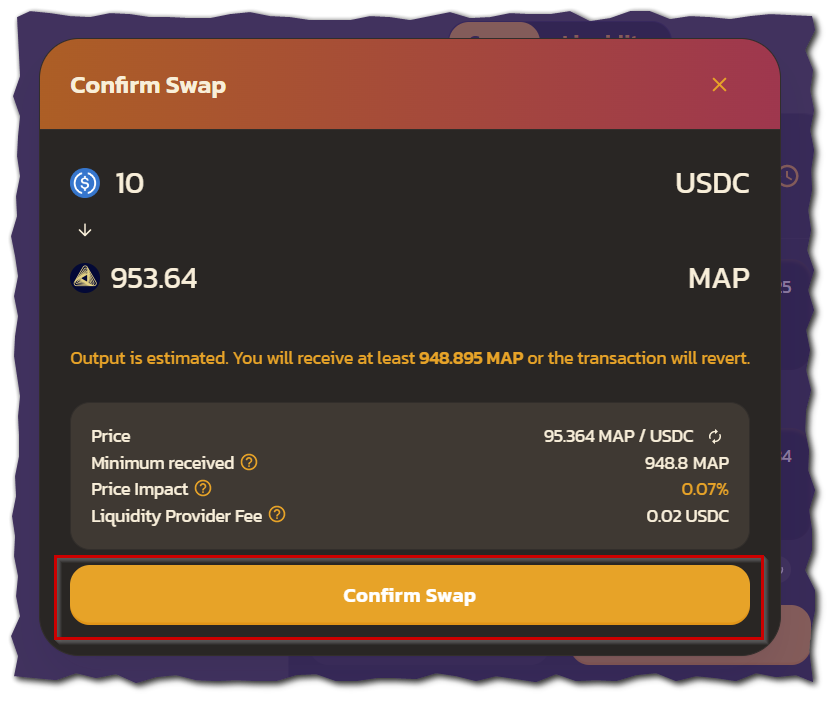
Everything is OK. Let’s Go!
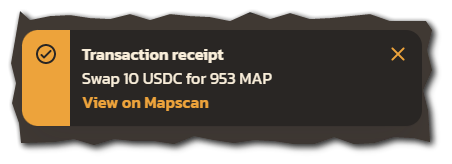
Once the transaction has completed, a notification will alert you to the status. You can track the progress of the transaction on MapoScan.
 Upon completion, $MAPO tokens will be visible in your wallet.
![]() Congratulations! You are now an proud owner of $MAPO.
Congratulations! You are now an proud owner of $MAPO.
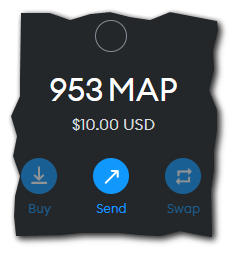
Success!
About MAP Protocol
MAP Protocol is the ultimate omnichain layer of Web3 with provably secure cross-chain communication built on Light-client and ZK technology. MAP Protocol provides seamless communication with all chains and connects EVM with non-EVM. Developers can access a full suite of SDKs so their DApps can easily become omnichain applications.
Stay in touch with us via
- Community chat in Discord | Telegram
- Latest updates on Twitter | LinkedIn
- Technical know-how on GitHub | Docs
- More info on Whitepaper | Medium
- Insights on Substack
![]() Stake your $MAPO with a validator to earn rewards here by first ‘Locking’ and then ‘Voting’ with a validator: https://staking.mapprotocol.io
Stake your $MAPO with a validator to earn rewards here by first ‘Locking’ and then ‘Voting’ with a validator: https://staking.mapprotocol.io